10 Pinterest Pin Design Tips to Draw Attention
to Your Pinterest Pins and Boost Your Blog Traffic
Pinterest is by far the largest source of traffic for many blogs. It is my largest traffic source too. That's why it's so important to create compelling pins that get many clicks and repins and drive traffic to your site. A well-designed pin can keep giving you traffic for months and even years.
But your pin is competing for attention with a massive amount of other pins. To get people to notice your pin, click on your pins, repin your pin, and drive traffic to your site, you need good-looking, attention-grabbing pins that will stand out from the many other pins.
Here are some tips to help you create attention-getting, click-worthy pins. Keep in mind that these are guidelines and that there are no hard and fast rules.
Pinterest Design Tips
How to Design Pinterest-Friendly Pins that Will Get Tons of Repins, Clicks, Blog Traffic, and Sales
To create effective pins, you need to use images, color, text overlay, color, and design. Here are some tips on how to design pins that will stand out and get you more repins and traffic.
1 – Create vertical pins
I read some posts from people who didn't know what “vertical” pins are. Basically, vertical pins are tall pins (they are not wide – not square – not horizontal). Vertical is the opposite of horizontal.
In photography, vertical photos are called “portrait” photos, and horizontal photos are called “landscape” photos.
Image size
Today, Pinterest recommends vertical pins that have the following dimensions: 1000px wide x 1500px high – or any 2:3 aspect ratio. Tailwind mentions that a 1:2.1 ratio or 1000 px x 2100 px is also acceptable. However, many people report that longer pins work better.
Image format
I recommend saving your pins as a png to get the best quality image. jpg is okay too but png is better.
Why you need to use vertical, tall pins.
Pinterest is designed for vertical pins. Landscape, square and small pins get lost in the huge amount of Pinterest pins. Vertical pins are user-friendly, stand out better, and display better on most devices. They perform better, and get more clicks, repins, and traffic to your blog.
2 – Create evergreen pins
Evergreen pins are pins that are not time-sensitive and provide value for a long time. The content of evergreen pins will still be relevant 6 or 12 months from the day you posted them. Some people will see your pins and content months or even years after you posted it. Evergreen pins can continue to drive traffic to your blog for months and even years.
3 – Use bright, quality images and photos
To create good-looking pins, you need to use quality images. Choose a quality photo, image, or background image. Use original images when possible to make your pins stand out. Use your own photos when possible. It confuses Pinterest when you use free stock photos that other people are using for different topics.
See some great free and paid stock photo sites here.
Avoid images with people's faces – many people report that they don't work well. I have used images that include people's faces and they worked okay for me. Testing will tell what works for your audience.
4 – Target your niche, audience, and topic
Use images and colors that are appropriate for your niche. For each pin, use an image that is relevant to the topic of your pin.
Target your pin design to your audience. For example, pastel colors may work well if your audience is female.
5 – Use color to draw attention to your pins
The wrong colors can negatively impact your pin clicks, page views, and sales while the right colors can trigger positive emotions motivating your visitors to click on your pins and buy from your blog.
Bright, bold, warm colors stand out best on Pinterest but you have to keep your audience in mind. Several people have reported that images with warm tones of red, yellow, orange, purple, and brown are getting twice as many repins than cool colors like blue. That is my experience too.
Most of my pins have text with bold letters and bold colors. I use images with warm colors when available for the topic. My pins with more feminine, lighter pastel colors are not doing as well as the bolder pins. Take advantage of the impact color can have on your Pinterest pin clicks and choose colors that will create positive responses.
For best results, use images that include warm tones and use one or more warm colors in your text.
I have a blog post that goes more into detail on how to use color to get your pins to stand out, How to Use Color to Get More Clicks, Repins, and Page Views.
6 – Add easy-to-read text to your images to communicate your message
Provide a compelling headline on your image
Using compelling headlines on top of your image is just as important as the image itself.
Try different headlines and different pin designs to appeal to different poeple and see what works best.
Make your text large and bold to stand out and be easy to read.
Use bold and CAPITALIZED (UPPER CASE) text. Keep the text short to be readable. It's very important that the text on your pin is easy to read – even on mobile devices. Statistics show that the majority of people are checking Pinterest with mobile phones.
If needed for readability or emphasis, add a shape (e.g. a square or rectangular) behind your text. Adjust the shape size, color, and placement to create contrast for your text and make it stand out from the background. Use text colors that complement the primary color in the image.
Vary text size and color. Make your important keyword(s) stand out by using a larger font size, or a different color text.
Use easy-to-read fonts.
Some easy-to-read fonts that I like for large headlines include League Spartan, Oswald, and Open Sans Extra Bold. Don't use more than two or three different fonts in a pin. Use different sizes to make the larger text stand out. Use script (cursive) fonts sparingly because they are difficult to read. But you can use a few words in scripts for graphical effects. Use your brand fonts.
Use text color that contrasts with your background colors to make them easy to read. For example, a dark font on a light background is easy to read.
Use different text colors but no more than two or three colors.
Use your brand colors and brand fonts to give your pins a branded look.
7 – Add your URL or logo
Don't forget to add your URL or logo to your pin. The top or bottom center is a good place to put your logo.
8 – Use white space
Use white space to make some design elements stand out. White space around the text will help your text stand out.
Pinterest wants lots of content. The more content you provide, the better. Submitting new content will boost your Pinterest views and blog traffic.
Today, Pinterest likes pins that go to new blog posts best. But you can still promote your older, successful blog posts with new pins. A new pin image that goes to an old blog posts is still considered new content by Pinterest.
I recommend creating new blog posts regularly and creating 4-5 pins for each new blog post. And in addition to creating new blog content, go back to some older blog posts and create new pins for the older popular blog posts you want to promote.
The current recommendation is to wait 6 months before resubmitting pins you've used in the past. But it's better to create new pins. I recommend making a few easy changes to older pins so they become new content.
9 – How to create eye-catching pins quickly and easily
Creating 4-5 pins for each blog post may seem time-consuming – and it is if you create one pin at a time.
Batching pin design is more time-efficient than creating one pin at a time. Dedicate chunks of time to designing pins and creating a bunch of pins at the same time.
If you don't want to create your own pins, don't want to spend your time creating pins, or don't feel you can create good-looking pins, you can outsource pin creation.
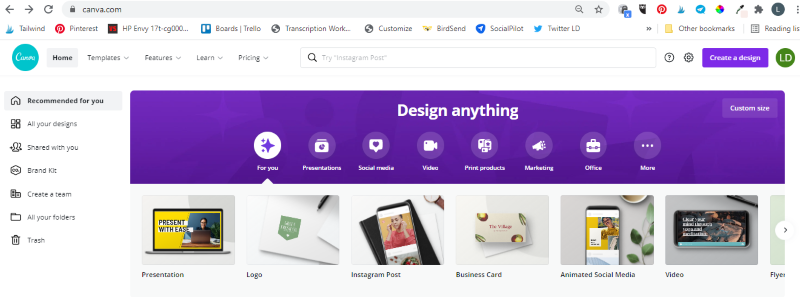
Another big time saver when creating Pinterest pins is to use templates. You can read my blog post here, How to Create Beautiful Pinterest Pins Quickly and Easily with Canva Templates.
And if you don't want to design your own pins, you can outsource pin design. You can find designers on fiverr, on many freelance sites, and on Pinterest.
To find designers on freelance sites, see my post, Best Freelance Job Sites for Beginners. I wrote this post to help poeple find freelance jobs but you can also use it to find freelancers that will work for you.
Do you need more details on how to create click-worthy pins?
Check out Nadalie's pin design course, Next Level Pin Designs $49
This is a great Pinterest Pin design course that teaches you exactly how to design your own unique “click-worthy” pins. And you can do the design FREE in Canva.
10 – How to create a large number of pins easily:
1 – Work in batches
Design in batches. You'll be amazed at how fast you can create pins when you design a bunch of them at the same time.
Schedule in batches. Schedule a bunch of your pins for a week or even a month. You can save a lot of time by doing this with Tailwind.
2 – Speed up design with templates
If designing pins is challenging for you, using templates can help you tremendously.
Using Pinterest templates is the easiest and fastest way to create Pinterest pins that get clicks to your website. And if use templates to design a bunch of pins at the same time, you'll save even more time.
Benefits of using professional templates:
- You can create beautiful pins in minutes without being a designer.
- Your pins will be more eye-catching and professional-looking.
- You'll get more clicks, repins, and traffic.
- You'll save lots of time and be able to create a month's worth of graphics in no time.
- You can spend time more time on other marketing tasks like creating new content for your blog.
Most of the pin templates (free and paid) are designed in Canva because it's one of the easiest programs to design pins and the most popular one. And any templates you purchase will work with the free version of Canva.
Free Canva Pin Templates from Tailwind
If you want to find out how you can easily create pins, try these free templates.
https://grow.tailwindapp.com/pinterest-pins-toolkit/monthly-templates
These free Tailwind templates are very nice. But because many people are using the free templates, your pins won't be unique. To make your pins stand out, I recommend getting some premium templates.
Feminine Canva Templates
Canva templates for Pinterest and more from Ivory Mix.
This site is great for feminine-looking templates and photos. Ivory Mix has a nice selection of Canva templates for Pinterest (16), Instagram (16), and Lead magnets (3). These are very well-designed, professional-looking templates with a feminine look.
Choose a small set of playful, chic, or casual Pinterest Canva templates. Or join their Stock photo membership that includes 15 Canva templates monthly, 4000+ photos & graphics, and access to all Ivory Mix courses. They have tons of super high-quality free photos, tips, instruction videos, and more. This is by far my favorite photo site.
I love the feminine Canva templates and stock images of Pixistock! If you’re looking for feminine Canva templates or stock images, this is a site you must check out. You can get free stock photos every month. And with the subscription, you'll get more feminine stock photos, new photos, Canva templates, and Instagram images. Check out Pixistock here.
Bluchic is well-known for its feminine WordPress themes. But did you know they also have Canva social media templates and lead magnet templates?
Get 85+ shareworthy Canva social media templates for Pinterest, Instagram, IG Stories, Facebook, and Twitter. $67 for 85 templates ( 7 sets of professionally-designed Canva social media templates with 5 options each),
The Pin Template Starter Kit from Nadalie Bardo – 20 templates $36
The Pin Template Starter Kit – This set of 20 Canva templates has a nice variety of designs.
This kit includes 60+ blog and social media marketing templates, including 10 Pinterest graphics, 10 IG stories graphics, 10 Facebook graphics, 10 Instagram graphics, 10 lead magnet promo graphics + a workbook, and an ebook template. Their colors are professional looking but more subdued.
What to do before submitting your pins
Make pins SEO friendly (Pinterest SEO)
Having good-looking pins is only the first step to your Pinterest success.
- Use the most relevant keywords in the text on your images and in the image file name. (Do keyword research first).
- Use a compelling title.
- Write a compelling description that includes your keywords.
- Add relevant hashtags to your description. While Pinterest allows you to use up to 20 hashtags according to Pinterest, it is best to use around 5 to 7 narrowly targeted, niche-specific hashtags after your pin description. Pinterest looks at those to understand the content of your pin. A newly saved pin with hashtags combined with a well-written description will perform drastically better than pins with no hashtags.
- Submit your pin to relevant boards. Ideally, those boards include your keywords.
- Use the same keywords that you have in your blog title that your pin links to.
- Add a TITLE tag and ALT tag to the Pinterest images (and other images) you put on your blog. This will help you with Pinterest SEO and Google SEO. Include your most important keywords in both the TITLE tag and ALT tags.
Using the Tasty Pins plugin makes it easy to hide multiple pins in my blog posts but it also helped me improve both my Pinterest and Google SEO.
Proofread your pins
Avoid spelling and grammar mistakes. You don't want to lose credibility and traffic because you have typos. Use Grammarly to check your spelling and grammar.
An easy solution to avoid mistakes is by using Grammarly. It checks your spelling, punctuation, and grammar on everything you're typing, even when you're designing pins in Canva.
Submit your pins
Schedule your pins with Tailwind.
Try Tailwind with the free Tailwind trial.
To schedule the number of pins you need to be successful on Pinterest and submit pins regularly, I highly recommend that you use Tailwind. Tailwind can schedule your pins at the optimal times when your audience is online. Click here to get the free Tailwind trial.
In addition to scheduling automation, another very important benefit of Tailwind is the Tribes feature. My traffic started to skyrocket when I started using the Tailwind scheduler and increased even more from getting a lot of repins from Tribes. See my review of Tailwind here.
Follow these guidelines to create attention-getting pins that will stand out, and get more clicks, repins, and traffic.
Use common sense, test, and analyze. Testing will tell you what works best and which images convert best for your business. Test different pin designs, colors, images, headlines, descriptions, and hashtags. I’m always experimenting with different pin designs to see which pins perform better. I would love to hear from you. Use the comments below to tell me what works well for you.
SOCIAL MEDIA RESOURCES
- The Best Free Stock Photos and Images.
- Tasty Pins plugin – WordPress plugin that hides and optimizes Pinterest images in your blog posts.
- Tailwind – The best scheduling tool for Pinterest. They have an Instagram version too (but I haven’t tried Tailwind for Instagram yet). Read my Tailwind review here.
- SmarterQueue – An all-in-one social media management tool that boosts engagement and lets you curate, schedule, listen, reply, and analyze in one place (SmarterQueue comes highly recommended by experts).
- Hootsuite – Automates scheduling for several social media (I used to use it but switched to using SocialPilot). You can read my Hootsuite review here.
- Social Media Marketing World 2021 – Discover the best social media marketing techniques from the world’s top experts. Or get the 2020 recordings.
